This chapter covers the basics of content creation with Hydejack.
Adding good images is key to a engaging blog experience. You can provide an image attribute in in the front matter of posts, pages, and projects* that will be used by Hydejack in a variety of ways,
such as header image in the blog and post layout, social media previews, cards in the gird and projects layout*, thumbnails in the search dropdown*, etc.
The image attribute will accept an URL to an image, but it is recommended that you provide a path / srcset hash instead, e.g.
image:
  path:    /assets/img/projects/hyde-v2.jpg
  srcset:
    1920w: /assets/img/projects/hyde-v2.jpg
    960w:  /assets/img/projects/hyde-v2@0,5x.jpg
    480w:  /assets/img/projects/hyde-v2@0,25x.jpg
Hydejack will show the image in various sizes depending on available screen width so that no specific size will fit all.
Instead, I recommend using a mipmap-like approach, providing the image in multiple sizes, each image half the width of the previous one.
Since Hydejack provides an appropriate sizes attribute, the browser can chose the best image from the provided source set.
If you have ImageMagick installed, you can use the following commands to create images at 50%, 25%, and 12.5% of the original image. Other image tools will provide similar capabilities.
convert your-image.jpg -resize 50% -sampling-factor 4:2:0 -strip -quality 85 -interlace JPEG -colorspace RGB your-image@0,5x.jpg
convert your-image.jpg -resize 25% -sampling-factor 4:2:0 -strip -quality 85 -interlace JPEG -colorspace RGB your-image@0,25x.jpg
convert your-image.jpg -resize 12.5% -sampling-factor 4:2:0 -strip -quality 85 -interlace JPEG -colorspace RGB your-image@0,125x.jpg
Note that the keys in the srcset hash have to be valid “descriptors” (as defined here). In practice this means the width in pixels followed by w.
The path key is a fallback image for browsers that don’t support the srcset attribute. It’s also used by jekyll-seo-tag for social media previews.
For more information on srcset, see the documentation at MDN, or this article from CSS-Tricks.
To add links to the sidebar, populate the menu entry in _config.yml with a list of title-url pairs, e.g.:
# file: `_config.yml`
menu:
  - title: Blog
    url:   /blog/
  - title: Projects
    url:   /projects/
  - title: Resume
    url:   /resume/
  - title: About
    url:   /about/
To add links to external sites, simply provide a fully qualified URL, e.g.
menu:
  - title: "@qwtel"
    url:   https://qwtel.com/
Hydejack allows you to use the list or grid* layout to show all posts of a particular category or tag.
Before you start, make sure your config files contains the features_categories and featured_tags collections:
# file: `_config.yml`
collections:
  featured_categories:
    permalink:         /:name/
    output:            true
  featured_tags:
    permalink:         /tag-:name/
    output:            true
Posts in Jekyll can belong to one or more categories, as well as one or more tags. They are defined in a post’s front matter:
---
layout:     post
title:      Welcome to Jekyll
categories: [jekyll, update]
tags:       [jekyll, update]
---
Posts can also be assigned to a category based on their position within the folder structure, e.g.
├── jekyll
│   └── update
│       └── _posts
│           └── 2017-04-07-welcome-to-jekyll.markdown
This will place “Welcome to Jekyll” in the categories jekyll and update.
This is now the preferred way of assigning categories in Hydejack, as it makes URLs correspond more naturally to the underlying folder structure.
Whether you use this method or not, categories will always be part of a posts URL, while tags will not.
| Type | URL |
|---|---|
| Categories | /jekyll/update/2017-04-07-welcome-to-jekyll/ |
| Tags | /2017-04-07-welcome-to-jekyll/ |
As far as Jekyll is concerned, this is the only difference.
Categories and tags are displayed by Hydejack below the title, after the date. Categories are displayed with the preposition “in”, while tags are displayed with the preposition “on”, e.g.
| Type | Title |
|---|---|
| Categories | Welcome to Jekyll¬ 07 Apr 2017 in Jekyll / Update |
| Tags | Welcome to Jekyll¬ 07 Apr 2017 on Jekyll, Update |
| Both | Welcome to Jekyll¬ 07 Apr 2017 in Jekyll / Update on Jekyll, Update |
You can adjust these in _data/string.yml.
By default, categories and tags are rendered as plain text. Further steps are necessary if you want them to link to a page that contains a list of all posts that belong to that category or tag.
For each featured category or tag, a file called <category-name>.md or <tag-name>.md has to be created inside the _featured_tags and _featured_categories folders, respectively. Each file in these folders is part of a Jekyll Collection.
The meta data of a category or tag is set in the files front matter, e.g.
# file: `_featured_categories/hyde.md`
---
layout: list
title:  Hyde
slug:   hyde
description: >
  Hyde is a brazen two-column [Jekyll](http://jekyllrb.com) theme.
  It's based on [Poole](http://getpoole.com), the Jekyll butler.
---
layoutlist or grid*titleslug is identical to the name.slugcategories: [jekyll] the slug must be jekyll. By default, the slug is derived from the title, but here it is recommended that you set it explicitly.descriptionmenutrue if you want the category or tag to appear in the sidebar. For more information, see Adding an entry to the sidebar.Once the file is created, the page can be found at /category/<categoryname>/ or /tag/<tagname>/.
About pages are a frequent use case, so Hydejack has a special layout for it. It is a slight modification of the page layout that allows showing the author information by adding the <!--author--> marker somewhere on the page.
To create an about page, make sure layout is set to about.
For more on authors, see Adding an author.
<!-- file: `about.md` -->
---
layout: about
title:  About
---

Some content

<!--author-->
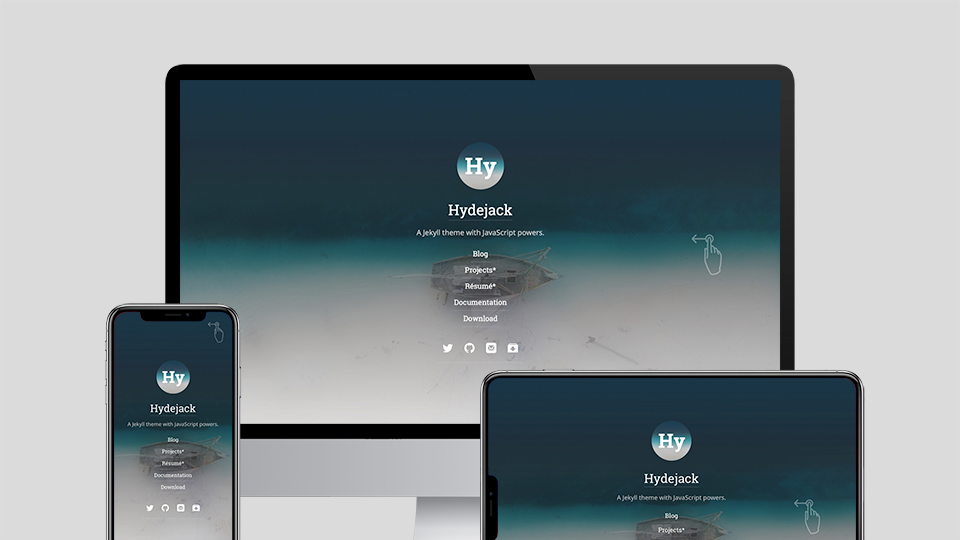
Hydejack 8 introduces cover pages, i.e. pages witht he sidebar opened, so that it spans the entire screen. This feature is intended for landing pages. To enable it on a page, simply add cover: true to the front matter.
# file: `index.md`
---
layout: welcome
title:  Welcome
cover:  true #!! Add this
---
You can choose which posts will appear in the “Related Posts” section below a post by adding the related_posts key to the front matter of a post
# file: `category/_posts/2020-02-01-some-post.md`
---
layout: post
related_posts:
  # Specify via the path in the file system
  - category/_posts/2020-01-01-other-post.md
  # Can also use the url of the post,
  # but this will break when changing the `permalink` setting!
  - /blog/category/2020-01-02-other-other-post/
---
The quickest and safest way to add custom CSS to Hydejack is via the _sass/my-inline.scss and _sass/my-style.scss files (create the folder/the files if they don’t exist).
To add CSS that gets inlined into the page, i.e. is loaded with the first request, put the CSS rules into my-inline.scss. This is intended for above-the-fold content. Otherwise put the CSS rules into my-style.scss.
Note that this distinction has no effect when no_inline_css is enabled.
To add custom HTML elements to the <head> of the document, open _includes/my-head.html (create the folder/the files if they don’t exist) and add your elements there.
To add custom HTML elements to the <body> of the document, open _includes/my-body.html (create the folder/the files if they don’t exist) and add your elements there.
my-scripts.html?my-scripts.html over my-body.html, as it won’t load scrips on redirect pages and will be ignored by browsers < IE10.If you bought the PRO version of Hydejack you have access to the welcome layout.
It is intended to showcase your projects and blog posts in a compact way.
Technically, it is a modified version of the about layout, so it allows showing the author information where the <!--author--> marker is put. Demo.
You can create a welcome page by creating a new markdown file and setting the layout to welcome in the front matter.
# file: `index.md`
---
layout: welcome
title:  Welcome
cover:  true
---
Without further configuration, the welcome page will just look like a regular page. However, it can be enhanced through the use of markers:
<!--projects--> marker to the content<!--posts--> marker to the content<!--posts_list--> marker to the content)The welcome layout also supports selecting specific projects and posts, by adding to the front matter, e.g.:
# file: `index.md`
---
selected_projects:
  - _projects/hydejack-v6.md
  - /projects/hyde-v2/
projects_page: projects.md
selected_posts:
  - _posts/2017-05-03-javascripten.md
  - /blog/2012-02-07-example-content/
posts_page: /blog/
featured: false
---
selected_projects<!--projects--> marker.
Either provide paths relative to the main directory with no leading /,
or URLs according to the schema defined in permalink.projects_page./,
or a URL according to the schema defined in permalink.selected_posts<!--posts--> or <!--posts_list--> marker.
Either provide paths relative to the main directory with no leading /,
or URLs according to the schema defined in permalink.posts_page./,
or a URL according to the schema defined in permalink.featuredtrue, project thumbnails will span the full width instead of half.
This setting takes precedence over the featured value of individual projects,
i.e. it will apply to the entire page.The projects page will show all projects of a particular collection.
First, you need to make sure that you have the projects collection defined in _config.yml:
# file: `_config.yml`
collections:
  projects:
    permalink: /projects/:path/
    output:    true
Next, add a projects.md to in the root (you can adjust the name/location to match the permalink of the
collection).
This file has the projects layout (mind the “s” at the end) and should have a show_collection key,
with the name of the collection as a value, e.g.:
# file: `projects.md`
---
layout:          projects
title:           Projects*
show_collection: projects
featured:        true
---
layoutprojects.titleshow_collectionprojects. See Organizing Projects for detail on how to handle multiple project collections.featuredtrue, project thumbnails will span the full width, instead of only half.
This setting takes precedence over the featured value of individual projects,
i.e. it will apply to the entire page.Projects are organized using Jekyll Collections. Each project generates an entry on the projects layout (Demo) as well as its own detail page (Demo).
Each project is defined by a file in the _projects directory.
The project’s meta information is defined in the file’s front matter. You can also add markdown content.
A project’s front matter should look like:
# file: `_projects/hyde-v2.md`
---
layout:      project
title:       Hyde v2*
date:        2 Jan 2014
image:
  path:       /assets/img/projects/hyde-v2@0,25x.jpg
  srcset:
    1920w:   /assets/img/projects/hyde-v2.jpg
    960w:    /assets/img/projects/hyde-v2@0,5x.jpg
    480w:    /assets/img/projects/hyde-v2@0,25x.jpg
caption:     Hyde is a brazen two-column Jekyll theme.
description: >
  Hyde is a brazen two-column [Jekyll](http://jekyllrb.com) theme.
  It's based on [Poole](http://getpoole.com), the Jekyll butler.
links:
  - title:   Demo
    url:     http://hyde.getpoole.com
  - title:   Source
    url:     https://github.com/poole/hyde
featured:    false
---
layoutprojectdateimagecaptionprojects layout.descriptionlinkstitle-url pairs that link to external resources related to this project.authorfeaturedtrue, the project preview will span the full content width. You can use this for projects that should receive more attention. You can set/override this for an entire page, by setting featured in the front matter (applies to the projects and welcome layout).If you want to organize your projects using categories or tags, similar to the way you do with posts, the best way is to achieve this is via multiple collections. Categories and tags are reserved for posts, and adding them to collections has no effect.
The default config file comes with one projects collection predefined, but we can easily add additional collections like so:
# file: `_config.yml`
collections:
  # The default projects collection
  projects:
    permalink:         /projects/:path/
    output:            true

  # Our new projects collection
  other_projects:
    # Make sure the permalink path is different!
    permalink:         /other-projects/:path/
    output:            true
Create a new folder in the top level directory that follows the naming convention _<collection name>. In our case the name is _other_projects.
In it, create collection items as shown above.
This is enough to render the project pages. To render them all on a single page, create a projects page as described above with the show_collection key set to our new collection, e.g.:
# file: "other-collection.md"
---
layout: projects
title: Other Projects*
show_collection: other_projects #!!
---
Note that the file name matches the other-projects path in the permalink we’ve defined above. This is to ensure that the directories match up.
Hydejack’s PRO version features a generalized resume layout. Demo.
It generates the resume page from a valid JSON Resume, which is good news if you already have a JSON resume. Otherwise, there are various ways of obtaining one:
resume.yml in _data directly. It contains example entries for each type of entry.Once you have a JSON Resume, place it into _data.
To render a resume page, create a new markdown file and set the layout to resume in the front matter:
# file: `resume.md`
---
layout: resume
title:  Resume
description: >
  A short description of the page for search engines (~150 characters long).
hide_description: true
---
You can download the final resume.json (minified) from the assets folder. When running locally, you can find it at _site/assets/resume.json.
You can customize the layout of the resume by rearranging the entries in the left_column and right_columns keys in the front matter, e.g.
# file: `resume.md`
---
layout: resume
left_column:
  - work
  - volunteer
  - education
  - awards
  - publications
  - references
right_column:
  - languages
  - skills
  - interests
---
By default, the layout will replace certain keywords with star icons. The keywords are as follows:
| Icon | Skills | Languages |
|---|---|---|
| 3/3, Master, Expert, Senior, Professional | 5/5, Native or bilingual proficiency, Native speaker | |
| 4/5, Full professional proficiency | ||
| 2/3, Intermediate, Advanced, Amateur | 3/5, Professional working proficiency | |
| 2/5, Limited working proficiency | ||
| 1/3, Beginner, Novice, Junior | 1/5, Elementary proficiency | |
| 0/3 | 0/5, No proficiency |
If a keyword is not recognized, the provided text will be spelled out instead. To disable icons and always spell out the text, set no_skill_icons and/or no_langauge_icons to true.
# file: `resume.md`
---
layout: resume
no_language_icons: true
no_skill_icons: true
---
You can add a specialized resume or multiple resumes by adding the resume YAML to the front matter under the resume key.
E.g.:
# file: `resume.md`
---
layout: resume
title:  Resume
description: >
  A short description of the page for search engines (~150 characters long).
resume:
  basics:
    name: "Richard Hendricks"
    label: "Programmer"
    picture: "/assets/icons/icon.png"
  # ...
---
Continue with Writing